Monday, October 24, 2011
First Craft Fair
So my first craft fair was this past weekend. Saturday was full of browsers and the sale of a pumpkin hat and a few pens. Sunday was FREEZING and really no one came out. But fear not I've already sent an email out about upcoming craft shows. So there will be more shows in my future!
Friday, October 21, 2011
The Art of Gift Giving
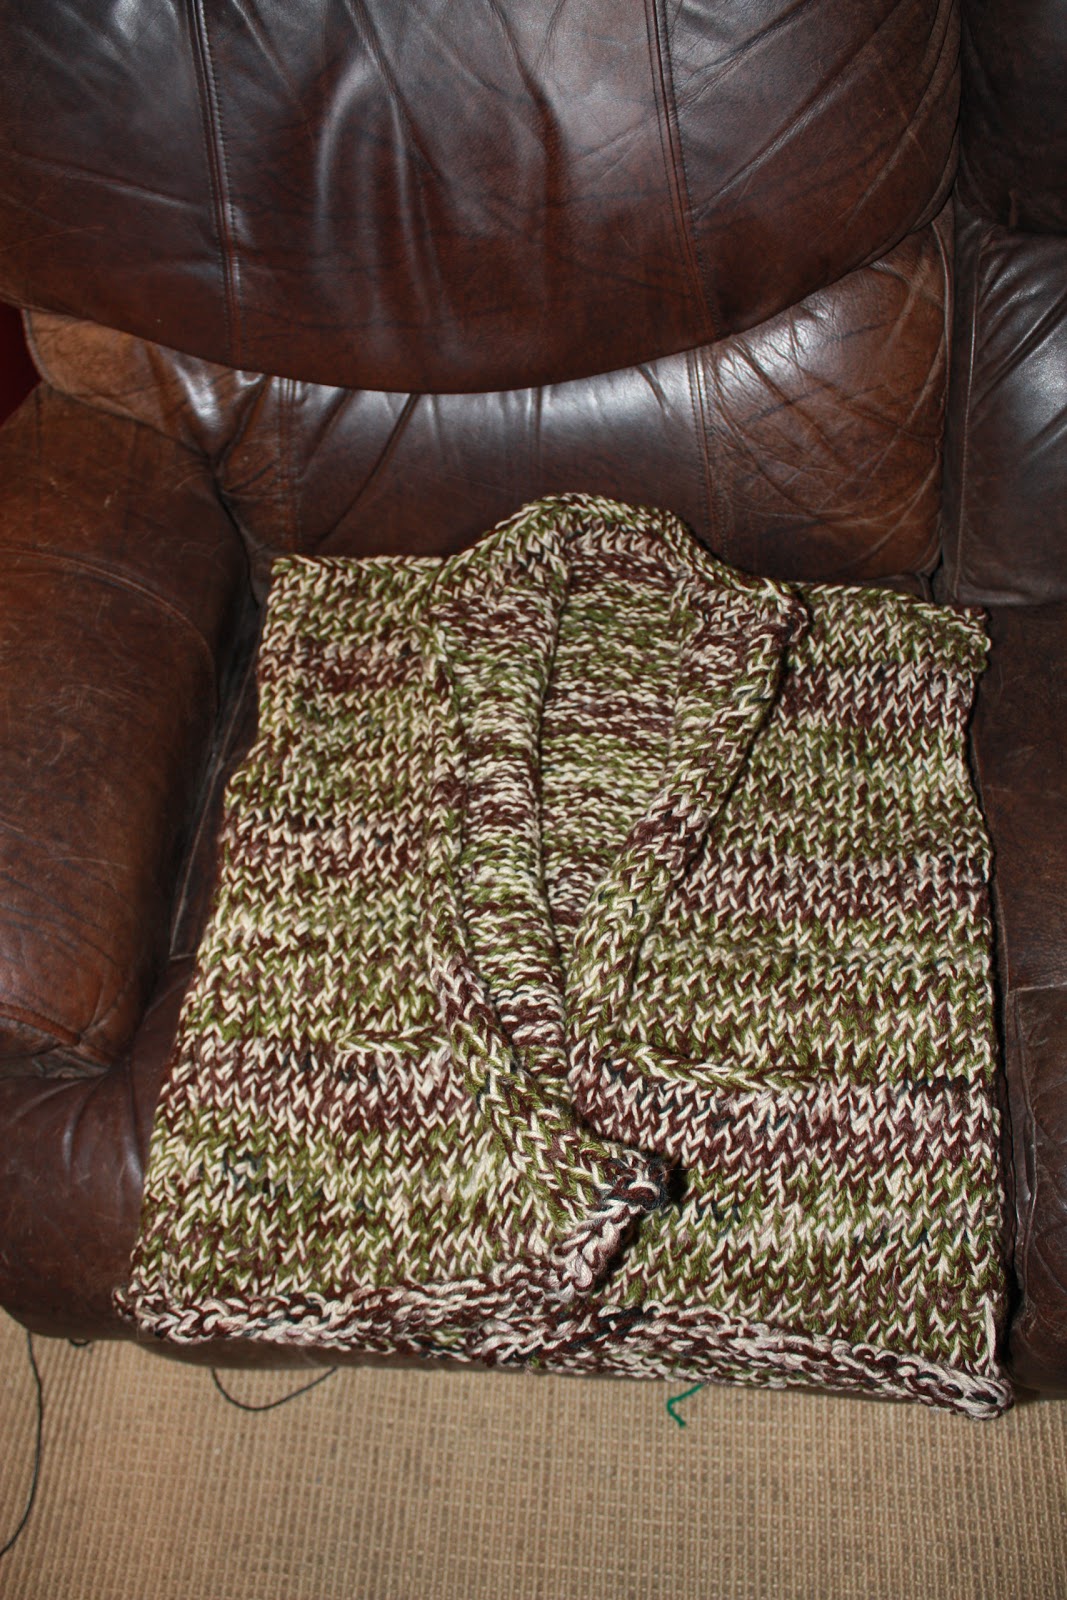
I make things for people. I'm not a huge fan of selling things. I have a problem putting a price on things that I make. In fact I'm kinda in an argument (but not really) with my husband about what I should be charging for things at this craft fair...Not only that but I have EXTREME anxiety about giving anything away. I'm always convinced that whoever I'm giving whatever I've made to is going to hate it....Anyway, most recently I made a vest for my mother-in-law's bff Gail. It's a knit vest (there are pictures below), made in earth tones with subtle striping and pockets. It's a super warm long vest. And the second it was in the mail I became convinced that she would hate it. Which I know is ridiculous (but not really, not everyone has to like what I make), but I'm telling you it was an awfully long wait to hear from my MIL (Mother-In-Law) about it. And even when she called and told me how much she and Gail love the vest I still proceeded to over think the vest.
The point of all this is I'm going to offer a few tips to those of you out there who have the same anxiety about giving away/selling things.
1. Do NOT listen to the voice inside your head that says, "who's really going to like this?" because all that does is make you lose faith in your project and you'll stop working on it.
2. Do not say, "I hope you like it, but if you don't I understand." WHY would this ever be ok to say? It's not, I've done so I know that it's not ok.
3. When someone tells you how much they like what you've made do NOT proceed to wonder how you could have made it better. If they like it that's all that matters. The ONLY time it's ok to think about how to make it better is if someone else asks for something similar then the only way to make it better is to make it how the second person wants it...but with your own personal spin.
4. Take a compliment. Say Thank you, be polite and DO NOT say, "I was so afraid you wouldn't like it." That makes it seem like you have a lack of confidence in yourself - which if you're like me you do, but that doesn't mean other people need to know that.
5. And this one is the most important - HAVE FUN. if you just remember to have fun with what you're making, that's all that matters. Who cares if people don't like what you made, if you had fun while making it and like it yourself - well all that means is that you now have something really cool to add to your stuff.
Now if you (read I) can just remember these easy little tips I think we'll all be a little better off. Now to the fun part - the pictures!!!!

Thursday, October 20, 2011
Craft Fair Preview
OK, so I've been on a mission to get as much inventory for this craft fair as I can. And so far it seems to have worked out pretty well below are pictures of my inventory that is ready to go. Keep in mind that all of the stuff here is also listed on my etsy shop: http://www.etsy.com/shop/Mismeggo?ref=si_shop


 For those of you who can't just hop a plane and come just for the craft fair ;-) if you are interested in any of the items here, check out my etsy shop and shoot me an email. <3


Wednesday, October 12, 2011
For those of you who don't know....
When you go into a fabric/craft/yarn store and there is a sale, you will NOT save money. In fact you will most likely end up spending more than you were planning on and buy 3 times as much junk. Not that it's junk - mind you - it's things that you need, but your spouse, family, whoever will not see it that way. To them, it's junk.
I mean who needs 6 pairs of knitting needles, and 10 more skeins of yarn? Someone who's getting ready for a craft fair...that's who. OK, so the knitting needles are for upcoming projects, but the yarn...well that's for hats, scarves, coffee cozies...all of the things I'm going to be selling in two weeks...
That's right ladies and gentlemen my first craft fair is only weeks away. I never thought that I'd be ready either, but I think I'm going to make it. I have a nice little inventory happening, and more things on the way to being made. Now if only I could get my cat off my arm so that I could go back to it....thank god for home row typing otherwise I wouldn't even be able to blog!
Oh! OK, she's gone, back to work. Wish me luck folks, I'm delving into the world of the Craft Fair.
Saturday, October 8, 2011
Circles to Circles
That's right ladies and gentleman, this month it's all about circles. Appropriate too don't you think? October, starts with an O (a circle), we carve pumpkins (circle), eat caramel/candy apples (circle). Circles are everywhere this month...and it's just a happy accident (or my subconscious) that I picked a circle for this month's motif.
Circles are one of the easiest things to make and they are the start to a many great projects - including stuffed animals. Called Amigurumi. (you can check out my etsy site and if we're friends on Facebok, check out the Haley's Comet photo album for examples). I did not decide to do an amigurumi this month - as easy as they are they can be a little expensive to make - with the fiber fill to stuff them and plastic eyes...No this month I went much simpler than that...Coasters. But I'm getting ahead of myself - let's start with the basic circle....
Abbreviations:
Chain - ch
Single Crochet - sc
What you'll need:
Yarn, crochet hook, and a stitch marker (you can buy these, or you can use a scarp of yarn in a contrasting color)
Ch 2
Round 1: 6 sc in 2nd ch from hook (I know this sounds ominous did to me too the first time I read that instruction, but trust me, all 6 stitches will fit in that one chain - and they will automatically form a circle). Place a stitch marker to mark the end of the round.
Round 2: 2sc in each crochet around (12 sc total)
Round 3: *1sc in next stitch, 2sc in next stitch, repeat from * around (18 stitches)

Round 4: *1sc in next 2 stitches, 2sc in following stitch repeat from* around.
Round 5: *1sc in next 3 stitches, 2sc in following stitch, repeat from * around.
repeat in this fashion, increasing the number of sc by one more each round and moving the stitch marker up with every round to keep track of where the last stitch in the round is. Until you're satisfied with the size of the circle.
When you reach the final stitch of your circle slip stitch into next next stitch and fasten off. Weave in ends.


Now...onto the fun part....COASTERS!!!!
Apple Coasters
Materials:
Size H crochet Hook
Red, Green, and Brown Yarn
Abbreviations:
Chain: ch
Single crochet: sc
Half Double crochet: hdc
Double Crochet: dc
Slip Stitch: ss
Apple:
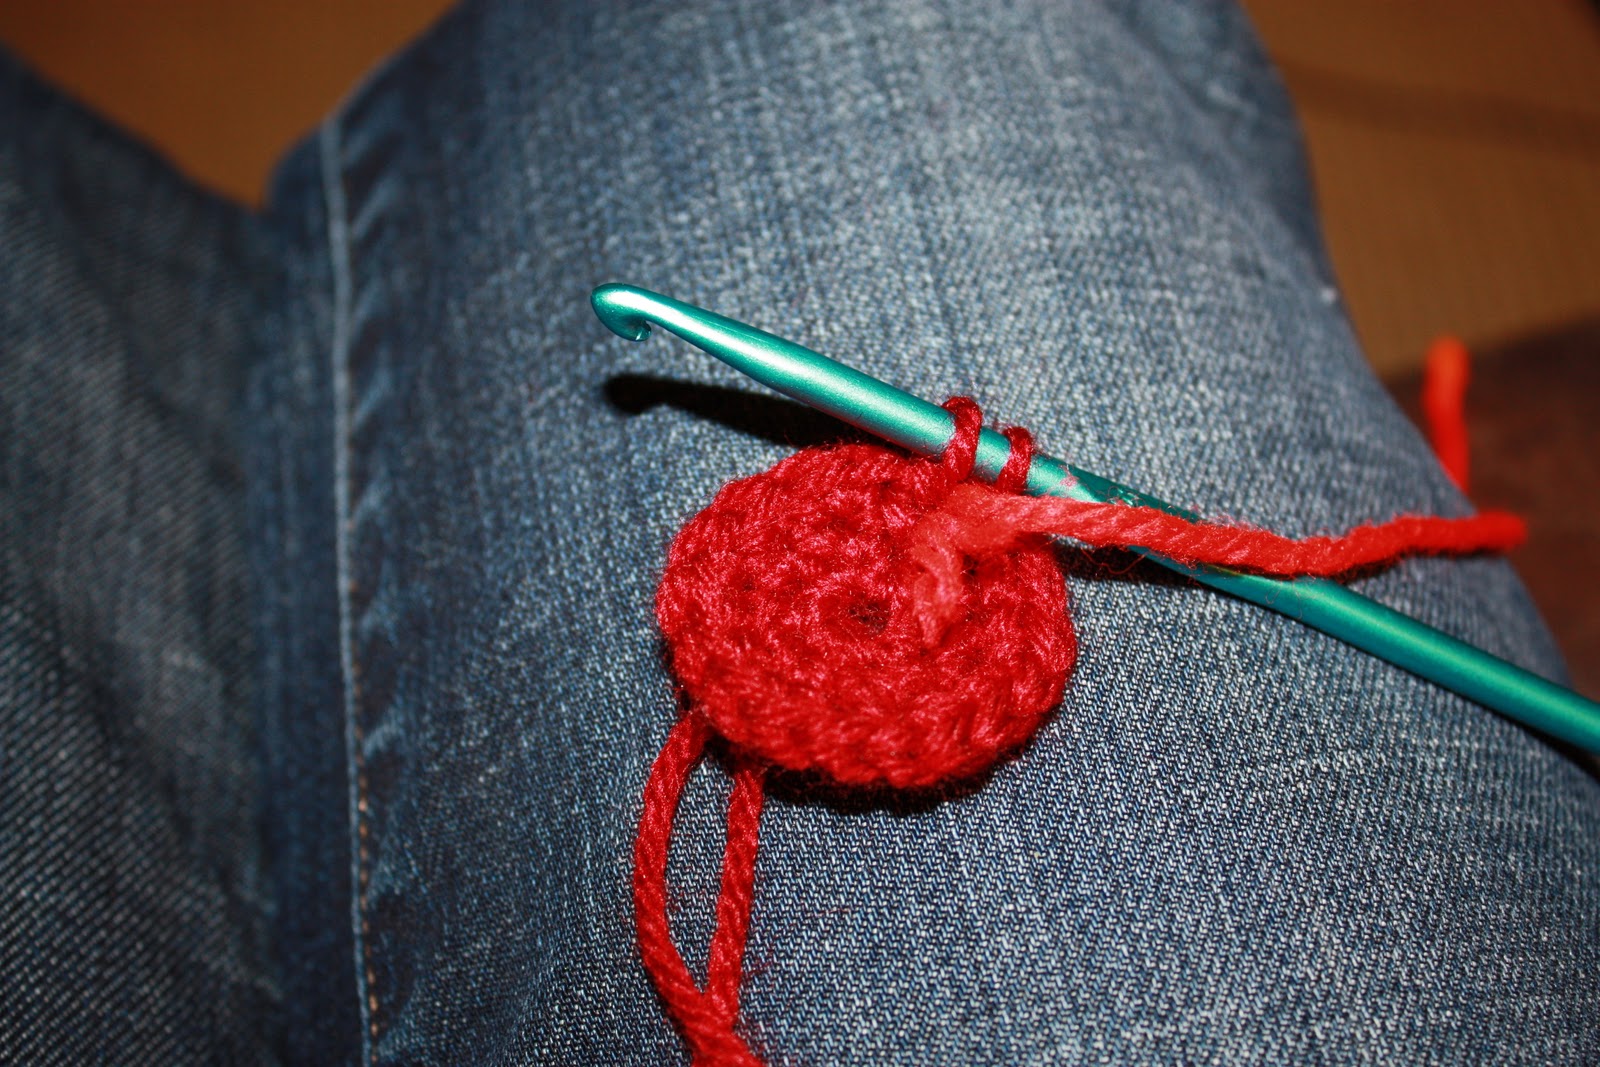
With Red Yarn ch2
Round 1: 6 sc in 2nd ch from hook. Place a stitch marker to mark the end of the round.
Round 2: 2sc in each crochet around (12 sc total)
Round 3: *1sc in next stitch, 2sc in next stitch, repeat from * around (18 stitches)
Round 4: *1sc in next 2 stitches, 2sc in following stitch repeat from* around.
Round 5: *1sc in next 3 stitches, 2sc in following stitch, repeat from * around.
Round 6: *1sc in next 4 stitches, 2sc in following stitch, repeat from * around.
Round 7: *1sc in next 5 stitches, 2sc in following stitch, repeat from * around.
Round 8: *1sc in next 6 stitches, 2sc in following stitch, repeat from * around.
Round 9: *1sc in next 7 stitches, 2sc in folowing stitch, repeat from * around.
Round 10: 1sc in every stitch, slip stitch in first st, fasten off, weave in ends.
Leaf:
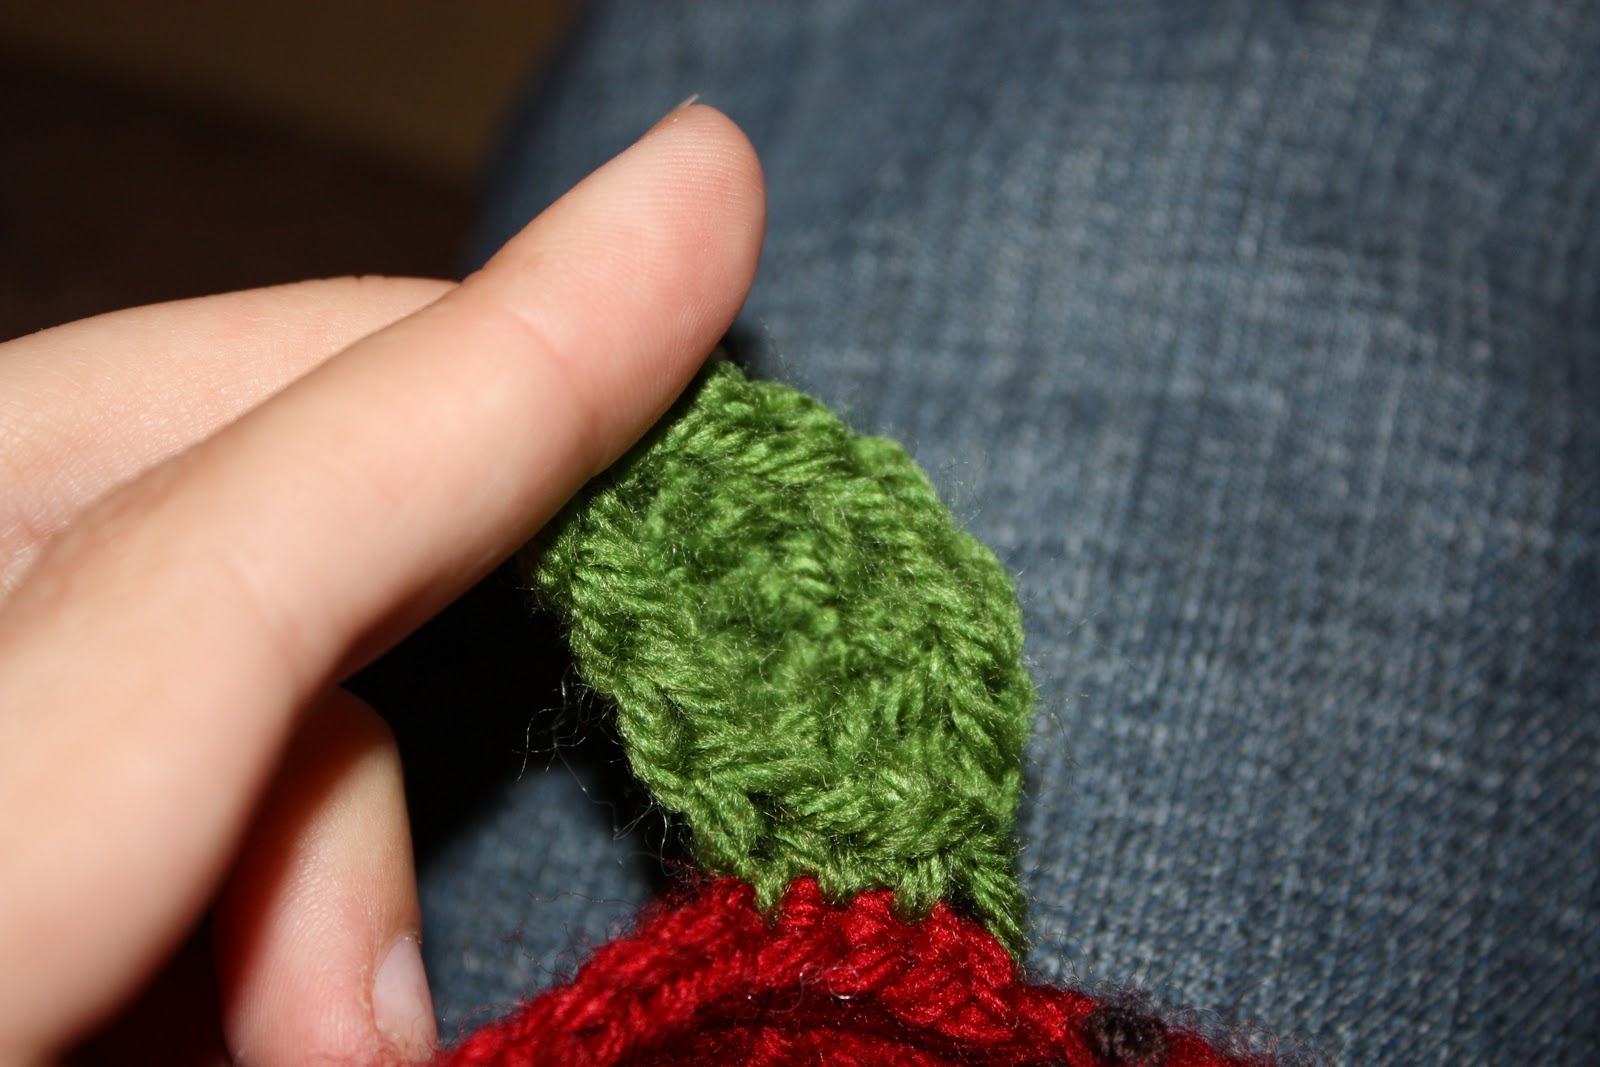
With Green ch 6
In 2nd ch from hook 2sc, 1hdc in next ch, 1dc in next ch, 1hdc in next ch, 3sc in final chain, turn leaf and in the bottom of the chains, 1hdc in next ch, 1dc in next ch, 1hdc in next ch, and 1sc in final ch. SS in 1st sc, fasten off. Weave in one end of leaf, leaving the other.
Holding the right sides of the leaf and apple together, whip stitch through the OUTSIDE LOOPS through three stitches. Knot off and weave in ends on wrong side of apple.
 Stem:
Stem:
With brown yarn, ch7
In 2nd ch from hook, sc aross.
Take ends and loop through two stitches, knot off and weave in ends on wrong side of apple.


Circles are one of the easiest things to make and they are the start to a many great projects - including stuffed animals. Called Amigurumi. (you can check out my etsy site and if we're friends on Facebok, check out the Haley's Comet photo album for examples). I did not decide to do an amigurumi this month - as easy as they are they can be a little expensive to make - with the fiber fill to stuff them and plastic eyes...No this month I went much simpler than that...Coasters. But I'm getting ahead of myself - let's start with the basic circle....
Abbreviations:
Chain - ch
Single Crochet - sc
What you'll need:
Yarn, crochet hook, and a stitch marker (you can buy these, or you can use a scarp of yarn in a contrasting color)
Ch 2
Round 1: 6 sc in 2nd ch from hook (I know this sounds ominous did to me too the first time I read that instruction, but trust me, all 6 stitches will fit in that one chain - and they will automatically form a circle). Place a stitch marker to mark the end of the round.
Round 2: 2sc in each crochet around (12 sc total)
Round 3: *1sc in next stitch, 2sc in next stitch, repeat from * around (18 stitches)
Round 4: *1sc in next 2 stitches, 2sc in following stitch repeat from* around.
Round 5: *1sc in next 3 stitches, 2sc in following stitch, repeat from * around.
repeat in this fashion, increasing the number of sc by one more each round and moving the stitch marker up with every round to keep track of where the last stitch in the round is. Until you're satisfied with the size of the circle.
When you reach the final stitch of your circle slip stitch into next next stitch and fasten off. Weave in ends.


Now...onto the fun part....COASTERS!!!!
Apple Coasters
Materials:
Size H crochet Hook
Red, Green, and Brown Yarn
Abbreviations:
Chain: ch
Single crochet: sc
Half Double crochet: hdc
Double Crochet: dc
Slip Stitch: ss
Apple:
With Red Yarn ch2
Round 1: 6 sc in 2nd ch from hook. Place a stitch marker to mark the end of the round.
Round 2: 2sc in each crochet around (12 sc total)
Round 3: *1sc in next stitch, 2sc in next stitch, repeat from * around (18 stitches)
Round 4: *1sc in next 2 stitches, 2sc in following stitch repeat from* around.
Round 5: *1sc in next 3 stitches, 2sc in following stitch, repeat from * around.
Round 6: *1sc in next 4 stitches, 2sc in following stitch, repeat from * around.
Round 7: *1sc in next 5 stitches, 2sc in following stitch, repeat from * around.
Round 8: *1sc in next 6 stitches, 2sc in following stitch, repeat from * around.
Round 9: *1sc in next 7 stitches, 2sc in folowing stitch, repeat from * around.
Round 10: 1sc in every stitch, slip stitch in first st, fasten off, weave in ends.
Leaf:
With Green ch 6
In 2nd ch from hook 2sc, 1hdc in next ch, 1dc in next ch, 1hdc in next ch, 3sc in final chain, turn leaf and in the bottom of the chains, 1hdc in next ch, 1dc in next ch, 1hdc in next ch, and 1sc in final ch. SS in 1st sc, fasten off. Weave in one end of leaf, leaving the other.
Holding the right sides of the leaf and apple together, whip stitch through the OUTSIDE LOOPS through three stitches. Knot off and weave in ends on wrong side of apple.
With brown yarn, ch7
In 2nd ch from hook, sc aross.
Take ends and loop through two stitches, knot off and weave in ends on wrong side of apple.

And there you have it! Apple Coasters, perfect for fall!

and max...he likes apples...

Taking the Plunge
I did it. I signed up for my first craft fair....and now I'm totally spazzing out about it. What do I make, how much of everything do I make...? *screams* So here's what I've decided on, since the name of the craft fair is "Pumpkins and Mums Annual Craft Fair" I'm going to stick to fall/winter themed things. Scarves, hats, and some really cool pens with flower tops, and some that look like brooms (inspired by my totally awesome friend's pens!). I have some cool patterns for bigger items like purses, but I'm thinking that for now I should stick to smaller items...but now the question...how much of everything do I make. I dont want to go too crazy (although it would seem that I already am)...maybe I'll just wing it and see how it goes. that's generally how it goes with me and I think it works the best...well there's my answer...ok...back to work...
But not to worry, I have a motif coming...it'll be up in the next posting - shortly.
:-D
But not to worry, I have a motif coming...it'll be up in the next posting - shortly.
:-D
Subscribe to:
Posts (Atom)